TERRACOTTA TILE INSTALLATION
Printable Installation instructions PDF

Where and how are they manufactured
Our traditional red terracotta is handmade by Canadian artisans using local clay. From clay cutting to packaging, each tile goes through at least six handling processes, ensuring the quality, consistency, and beauty of these top-quality artisanal tiles.
Where and how are they used
-
Indoor floors: Yes
-
Outdoor floors: Yes1
-
Flooring in high-traffic areas: Heavy
-
Commercial use: Yes
-
Compatible with radiant heat: Yes
-
Interior walls: Yes
-
Exterior walls: Yes
-
Around fireplaces: Yes
-
Kitchen backsplash: Yes
-
Sink backsplashes: Yes
-
Showers: Yes
-
Steam showers: Yes
-
UV resistant: Yes
-
Suitable for thawing areas: No
-
Swimming pools: No
(1) These installations require greater consideration and are not recommended for extremely cold climates.
Grout joint size and color
Grout joint dimension refers to the space between each tile, and grout is what you use to fill in such spaces. It is recommended to maintain the default grout joint thickness of 1/8” (0.3 cm); however, the thickness of the grout line can dramatically alter the appearance of the final installation. For joints of 3/4” (2 cm) or greater, we recommend using a paver grout, such as Mapei 2.5:1.
Just as with grout joint thickness, the selection of grout color is flexible. To ensure satisfaction with the final result, ask your contractor to complete the tile installation and then use the grout color chart to make the appropriate selection. It’s important to consider that the time of day and lighting can affect the appearance of the tile/grout.
Riad Tile recommends the use of high-quality grout, such as Mapei Flexcolor CQ or Custom Prism Ultimate Performance.
Installation
Before starting
The proper installation of your handmade terracotta tile can only be carried out by a qualified and competent installer with years of experience in placing artisanal tiles. This is not a product that you can install on your own.
Due to the handcrafted nature of terracotta tiles, there are varying degrees of variation in surface texture, color, tone, and size across all production batches. You may notice glaze pops, ghosting images, or kiln marks on the tile, or possibly small white deposits on the tile surface. This is normal and expected in tiles handmade in small quantities. Therefore, your sample might not be an exact replica of your order. Additionally, subsequent orders will undoubtedly come from a different batch and may not perfectly match your original order.
Inspection of your order
Terracotta tiles are fragile. Depending on the handling method and frequency, they are susceptible to scratches, chipping, and cracking. During shipping, there is always a possibility that a small percentage of the tiles may get damaged.
-
Visible Damage: It is your responsibility, as the recipient of the order, to note any visible damage on all copies of the delivery receipt or on the driver’s handheld device and request an Additional Services Form to record the damage. Take multiple photos of the damage before unpacking the order. Immediately notify Riad Tile of the damage through an email to hello@earthsmithtile.com. Include a description of the damages along with the photos.
-
Hidden Damages: Hidden damages must be reported within 24 hours of delivery. Keep all packaging materials and immediately notify Riad Tile of the damages through an email to hello@riadtile.com. Include a description of the damages along with the photos.
Store your tiles in a dry area. Do not allow the boxes to become damp.
General installation guidelines
Due to the handmade nature of Riad Tile’s terracotta tiles, there are varying degrees of variation in surface texture, color, tone, and size.
Because of the inherent variations in this product, it’s important to mix tiles from all boxes of your order. To ensure you’re satisfied with the distribution, conduct a dry layout test. Before installation, clean any dust or dirt from the tile surface using a soft cloth and a pH-neutral cleaner. Allow them to dry before installing.
What you will need
-
Bucket
-
Sponge
-
1/2″ notched trowel
-
High-quality medium to large format tile mortar, such as ProLite Premium Large Format Tile Mortar
-
1/8″ tile spacers (or other type)
-
Grout float
-
Cement grout, such as Custom Prism Ultimate Performance
-
Wet saw with diamond blade suitable for tiles
-
Tray and foam roller
-
pH-neutral cleaner
-
Lint-free microfiber cloth
-
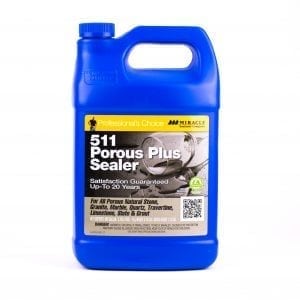
High-quality impregnating sealer: Stain-Proof Color Enhancing Sealer or Stain-Proof Premium Impregnating Sealer.
Terracotta Tile Installation
Handmade terracotta is NOT a product that you can install on your own, and Riad Tile recommends hiring a professional tile installer with extensive experience in similar handmade tile installations. The following guidelines aim to provide support to the installer and maximize the success of the installation. If you ever feel uncertain about any aspect of your order or have questions about the tile you are installing, reach out to Riad Tile for support.
If you need to make cuts, make sure to thoroughly clean all tiles immediately after cutting them with a wet saw to prevent cutting paste stains.
For floor installations, install your tiles on a suitable, stable, and fully cured surface with a proper substrate or underlayment membrane. Your installation might require a decoupling membrane, such as Schluter Systems Ditra (or an equivalent), to prevent issues after installation.
For wall installations, apply only on suitable, even, and stable surfaces. Never apply directly on a painted surface. Perform the installation with appropriate materials that prevent tile slippage/falling or use joint spacers to maintain uniform joint spaces.
Riad Tile recommends using a rapid-setting installation mortar, such as Custom ProLite Premium Large Format Tile Mortar, or an equivalent. Follow the adhesive manufacturer’s instructions. Using a trowel, ensure full coverage of mortar or adhesive on the back of the tile.
Spread the mortar onto the installation surface using a notched trowel. Make sure the placed tiles are level. Do not use a hammer or mallet to set the tiles, just apply hand pressure.
Immediately clean any residual adhesive from the tile surface because waiting can make it difficult to remove without damaging the tile.
Allow 48 hours for the adhesive to cure before sealing.
Sealing Before Grouting
Before sealing, clean any dust or dirt from the tile surface using a soft cloth and a pH-neutral cleaner. Allow them to dry before sealing.
The final color of the tile could be altered at this step of the installation. To preserve the tile color, you should use a sealer that does not enhance the tone, such as Stain-Proof Premium Impregnating Sealer.
For a deeper and darker color, you should use a sealer that enhances the tone, like Stain-Proof Color Enhancing Sealer. Be sure to perform a test before sealing the entire tile surface. Multiple applications can intensify the color, so testing is important.
Apply the impregnating sealer according to the manufacturer’s instructions. For best results, apply the product in thin, even layers. Uneven application could result in an undesired finish.
Wait for the sealer to cure according to the manufacturer’s recommendations (usually 24 hours or more).
Grouting Application
The selected grout may potentially stain the tile surface, even after sealing. Make sure to perform a test in a small area. If this occurs, adjust the grout specification or use a grout bag.
Ensure that both the tile surface and the grout lines are residue-free before applying the grout. Do not use tapes or adhesives on the sealed tile when applying grout, as this may mar the tile.
Work in small sections, ensuring all grout lines are filled and continuously clean excess grout. Using a damp grout sponge, gently wipe the tile in a circular motion to remove excess grout and achieve a smooth, uniform line.
Clean the tile with a pH-neutral cleaner and a damp microfiber cloth to remove all residual grout from the tile surface. Use each side of the cloth only once, rinsing it frequently.
Allow the grout to cure according to the manufacturer’s recommendations, typically for 24 hours or more.
Sealing After Grouting
Before sealing, clean any dust or dirt from the tile surface using a soft cloth and a pH-neutral cleaner. Allow them to dry before the final sealing.
Apply the impregnating sealer according to the manufacturer’s instructions. For best results, apply the product in thin, even layers. Uneven application could result in an undesired finish.
Maintenance: General Care
Terracotta tiles “age” like natural stone products, and over time, a patina will develop in high-use or high-traffic areas.
Properly installed and sealed terracotta requires minimal maintenance beyond regular cleaning. Here are some tips to keep your tiles looking beautiful for years to come:
Keep the tile surface clean to prevent abrasive particles from scratching the surface.
Clean up spills immediately. Allowing liquids to sit on the tile surface for extended periods could lead to staining.
Use only mild soap or a pH-neutral cleaner with a damp cloth or mop. Never use harsh chemicals or abrasives.
Re-Sealing
Terracotta tiles can be re-sealed as often as deemed necessary.