Inside Tips for Installing Zellige Tile
Design trends constantly change. So, how do you keep up with current styles and create a timeless look? Zellige tile is a popular classic décor choice. Artisans make each of Riad Tile’s glazed terracotta Moroccan tiles by hand, one at a time. That means no two tiles are ever the same. Each unique finished product adds a rich, eclectic mix of color, texture and glaze to any space. Zellige’s imperfections accentuate its indelible character.
Follow these Zellige installation tips when you use this stunning tile in your next home interior project.
Multiple Application and Design Possibilities
The art of Zellige originated over 1,300 years ago in modern-day Spain. Craftspeople mix natural clay with water, shape each tile by hand and dry them. Then, they kiln-fire Zellige tiles over olive branches, giving each tile its extraordinary color palette and pattern.
This centuries-old tile’s classic appeal works well in various design schemes, from farmhouse/cottage to Old World charm and Mid-century modern.
As for layout, you can vertically stack them on an entire wall—like in a shower—or stagger them subway-style for a kitchen or bathroom backsplash. Here’s an example of vertical stacking with Riad’s Blush Zellige 2″x6″x7/8″ tile.
You can also use Zellige tiles on the floor or arrange them to create an attractive border.
Installation Inspiration Spotlight
DIYer Chelsea McLemore passes on some lessons she learned while installing Riad Tile’s Natural White Thin Zellige in her recent kitchen renovation. We are the only company in the U.S. that sells thin Zellige.
View this post on Instagram
Chelsea calls out these crucial points in her Instagram video.
- Miter your corners – Zellige tiles don’t come with traditional trim pieces. So, you’ll want to miter outside edges that wrap around a wall or windowsill to get a finished look.
- Soak your tile in water for 1-2 minutes before applying – Do this because Zellige is porous, and if you don’t soak them, the tiles won’t properly adhere to the wall.
- Level tile on the highest point of the bottom tile – Always make sure the bottom row of your tile is level.
View this post on Instagram
We love the weathered charm Zellige adds to Chelsea’s kitchen renovation. Notice how the backsplash tiles look raised and uneven. This fun texture makes the space pop.
View this post on Instagram
Here’s another view set against exquisite lighting installed by @electricalhomesolutions. Everything looks so warm and inviting!
View this post on Instagram
And a closeup featuring Riad’s Natural White Thin Zellige in Chelsea’s shelf-styling video.
More Zellige Installation Tips
Whether you’re a seasoned home improvement DIYer or starting your first renovations, these helpful tips are specifically geared toward installing Zellige tile. If you need more clarification about tackling it, you can always hire a pro.
Reminders, Sealing and Prep
- Remember that handmade Zellige tiles have color variations and maybe even some chipping as their signature style.
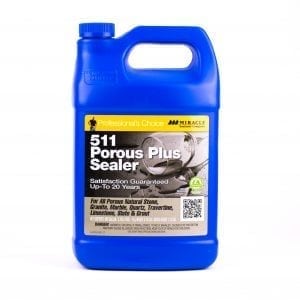
- Zellige is glazed terracotta tile, so it does not require sealing. However, if you purchase Unglazed Natural Zellige, Riad recommends using a penetrating sealer like Miracle 511 Porous Plus to protect the tile before applying grout and after grouting because unglazed terracotta is absorbent and porous.
- Always mix tiles from different boxes before you install them to maximize Zellige’s charming color blends and imperfections.
- Soak each tile in water for 1-2 minutes, as noted above.
- Level walls and remove any dust or debris.
Once you have completed your prep work, it’s time for the fun part: installing the tiles!
Applying Adhesive, Setting Tiles, Spacing and Cutting
- Apply one layer of adhesive on the wall.
- Apply another layer of adhesive on the back of the tile.
- Set tiles into the wall one at a time.
- You’ll need to use wedge spacers—usually very small, like 1/16″—to align Zellige’s signature uneven edges. Spacer size can vary according to each tile edge.
- The traditional Zellige installation method doesn’t use grout joints. Instead, lay tiles edge to edge by hand and use minimal grout spacing.
- Zellige tiles cut easily. You can snap them with a traditional tile cutter or slice them with a wet diamond blade.
Grout and Cleanup
Grouting and cleanup finish the job.
- Use Mapei Ultracolor Plus FA to grout glazed tiles and Mapei Flexcolor CQ for Unglazed Natural Tile. Grout will also fill chips, cracks, pits, and gaps.
- For cleanup, remove excess grout and grout film with a damp cloth.
Zellige Flooring
Zellige flooring applications work best in light-traffic areas with minimal heavy impacts. To ensure perfect bonding between Zellige tiles and the subfloor, pay close attention when applying adhesive on the floor and back of the tiles.
Zellige in Wet Areas
In wet areas like swimming pools, shower floors and walls, and fountains, ensure the surface you will lay Zellige tiles on is waterproof, stable and rigid before installing. Also, use adhesive cement and grout that are suitable for wet spaces.
Follow these tips, and you’ll be well on your way to creating a classic Zellige transformation in your home.


